The following article explains how to add a MySQL database in cPanel. You can use cPanel's built-in MySQL database interface to add new MySQL databases. This procedure must be performed as the user for the domain, rather than as the administrator. Before you create the database, you must ensure the MySQL service is running.
To ensure the MySQL service is running, please follow these steps:
- Open a web browser and connect to your WHM Control Panel located at https://<server_ip address>:2087.
- Login as the user for the domain.
-
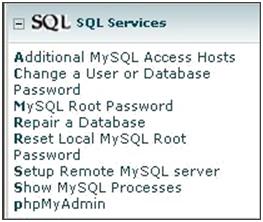
From the left side menu, under SQL Services, click Show MySQL Processes.
- If the screen is blank, you will need to start the service. If it displays information about processes, you can skip to the next section.
-
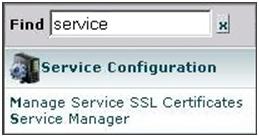
From the left side menu, under Service Configuration, click Service Manager.
-
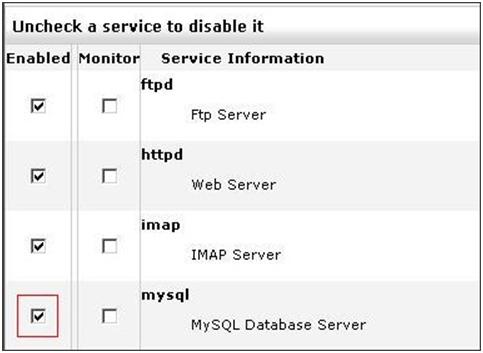
Check Enabled for mysql.
To add a MySQL database, please follow these steps:
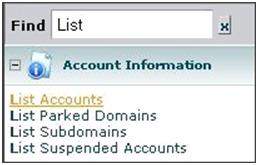
- While still in WHM (https://<server_ip address>:2087), from the left side men under Account Information, click List Accounts. If you do not have this information, please skip to step 3.
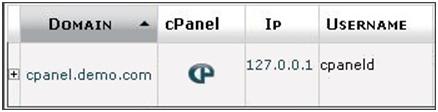
- Find the appropriate domain and click the cPanel icon to enter the cPanel Reseller Menu. A new window will open and you will be logged in as the domain administrator for the domain.
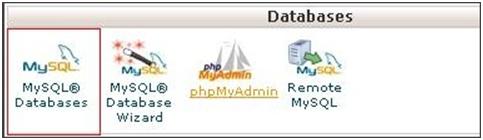
- Once logged into cPanel for the domain (typically https://www.yourdomain.com:2083), click MySQL databases under the Databases section.
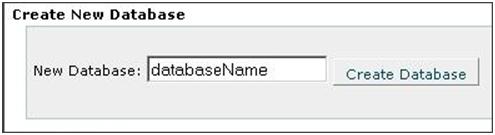
- Enter a name for the database and click Create Database.
- Once the database creation completes, click Go Back.
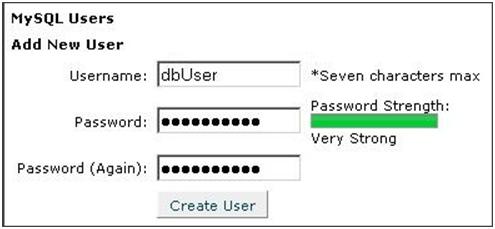
- Enter a username and a strong password for the database and click Create User.
- Once the user creation completes, click Go Back.
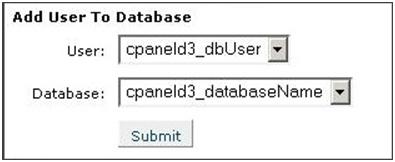
- Now you need to add the user to the database. Under Add User To Database, select the appropriate user and database.
- Click Submit.
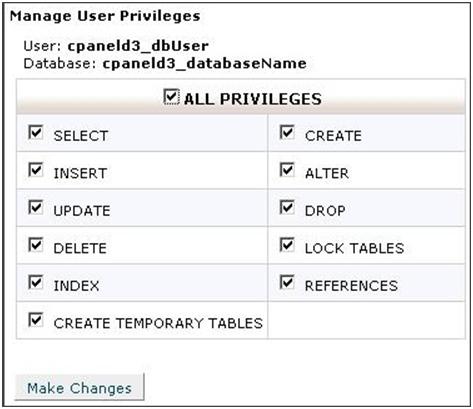
- Select the appropriate database permissions for the user and click Make Changes.
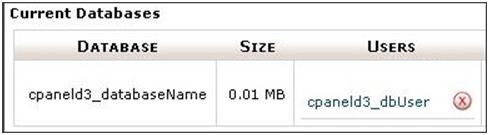
The database you created should now be displayed with the user you selected and you can now connect to it from code or externally.